







SHOP WHAT YOU NEED
Explore the products below to collect everything you need for this project

![LQX MARKER BRIGHT PINK [DIGITAL SWATCH]](http://www.liquitex.com/cdn/shop/files/152893_375x375_crop_center.jpg?v=1773141303)


![LQX MARKER RED [DIGITAL SWATCH]](http://www.liquitex.com/cdn/shop/files/152898_6e891482-b681-405a-b0f1-4c3ceee75228_375x375_crop_center.jpg?v=1773141066)

![LQX MARKER YELLOW [DIGITAL SWATCH]](http://www.liquitex.com/cdn/shop/files/152905_60dbaa0f-7b09-4c19-9199-d133cf895cdb_375x375_crop_center.jpg?v=1773146099)

![LQX MARKER LIGHT BLUE [DIGITAL SWATCH]](http://www.liquitex.com/cdn/shop/files/152883_375x375_crop_center.jpg?v=1773141333)

![LQX MARKER WHITE [DIGITAL SWATCH]](http://www.liquitex.com/cdn/shop/files/152867_558ae1f7-7dc4-46c6-85f4-7e16cc6e2871_375x375_crop_center.jpg?v=1773140784)

![LQX MARKER BLACK [DIGITAL SWATCH]](http://www.liquitex.com/cdn/shop/files/152862_53cfec6d-8e84-41b3-ae19-3737d18c343d_375x375_crop_center.jpg?v=1773141261)


STEP 1
PREP USING MARKERS
Choose either hot press watercolor paper or primed Liquitex Recycled Canvas to work on. If using the hot press watercolor paper, be sure to secure the paper to a board or work surface for stability.
When the marker is brand new the nib will appear white. Simply shake the closed marker several times to distribute the paint. Take off the cap and depress the nib 2–3 times to saturate before using.
Get familiar with the flow of the markers by practicing some of your mark making on a separate sheet of paper. This will also serve as a guide or reference for mark making ideas you might add to your composition.

STEP 2
BLOCK IN COLOR
Start by using an 8mm Yellow acrylic marker to begin defining the composition with broad, interconnected lines like pathways across the surface. Occupy about 60% of the picture plane to leave enough open space for the composition to breathe.
Next, using the 15mm Orange acrylic marker, fill two areas within the yellow composition to establish larger shapes and create focal points for future layers of mark making.

STEP 3
CREATE MOTIFS AND PATTERNS
Use the 8mm Red, 2mm Light Blue, and White markers to add small, repetitive marks and motifs within the yellow and orange defined areas.
Reference some of the designs and marks you may have created on a separate sheet of paper.

STEP 4
ADD SCRIBBLES AND FORM
Look at how the overall image is developing and where you notice the beginnings of recognizable forms (a face, hand, flower, shape). Use the 2mm Black marker to create loose, energetic scribbles throughout 2–3 selected areas of the composition.
Allow the surface underneath to show through the scribbling to keep the balance, openness, and a sense of flow. These glimpses of the earlier layers create depth and movement. Think of the scribbles as a veil rather than a solid covering.
NOTE: If the marker becomes dry while scribbling, simply place the cap on the marker, shake to mix the paint. Next, take the cap off and depress the nib 1–2 times so the paint comes down.

STEP 5
DEFINE AND EMBELLISH
Use the 2mm and 8mm markers to draw lines through solid sections to connect to different areas within the composition. Have fun tweaking areas and adding embellished marks and lines as you wish.
Continue to add designs and marks in response to the shapes and forms that begin to emerge within your composition.
Use the Black marker to further define and emphasize areas of focus. Highlight with the 2mm White marker.
High key colors such as light blue, bright pink and white pair well over solid black creating interesting contrast.

STEP 6
ADD FINISHING TOUCHES
Add additional line work or shading throughout the piece using the 2mm Black marker, or try alternate materials like a charcoal or grease pencil for varied textures.
Enjoy the freedom in mark making with acrylic markers using simple composition as your foundation.
Because each composition develops differently, every artwork will be unique. There is no single right answer as each artist will discover a unique path through their own mark making journey.


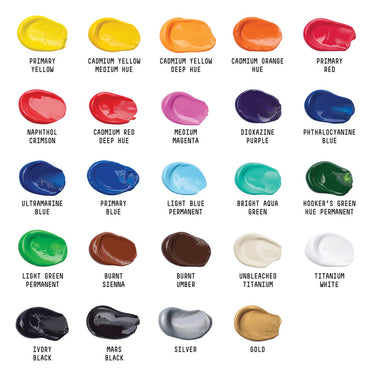
![LQX BASICS 24X22ML PAINT SET 887452028543 [FRONT]](http://www.liquitex.com/cdn/shop/files/80833_375x375_crop_center.jpg?v=1762458732)
![LQX ACRYLIC MARKER SET 6X 2-4MM CLASSICS [CONTENTS] 887452001225](http://www.liquitex.com/cdn/shop/files/68762_375x375_crop_center.jpg?v=1707320720)


![LQX BASICS 6x118ML SET 887452059226 [SET WITH CONTENTS 2]](http://www.liquitex.com/cdn/shop/files/130398_375x375_crop_center.jpg?v=1707324060)
![LQX BASICS 6x118ML SET 887452059226 [FRONT]](http://www.liquitex.com/cdn/shop/files/130396_375x375_crop_center.jpg?v=1762458768)
![LQX MATTE POURING MEDIUM SET [CONTENTS] 887452048695 [NA]](http://www.liquitex.com/cdn/shop/files/96237_375x375_crop_center.jpg?v=1762458531)