








SHOP WHAT YOU NEED
Explore the products below to collect everything you need for this project

![LQX MARKER BRIGHT PINK [DIGITAL SWATCH]](http://www.liquitex.com/cdn/shop/files/152893_375x375_crop_center.jpg?v=1773141303)


![LQX MARKER YELLOW [DIGITAL SWATCH]](http://www.liquitex.com/cdn/shop/files/152905_60dbaa0f-7b09-4c19-9199-d133cf895cdb_375x375_crop_center.jpg?v=1773146099)

![LQX MARKER RED [DIGITAL SWATCH]](http://www.liquitex.com/cdn/shop/files/152898_6e891482-b681-405a-b0f1-4c3ceee75228_375x375_crop_center.jpg?v=1773141066)

![LQX MARKER LIGHT BLUE [DIGITAL SWATCH]](http://www.liquitex.com/cdn/shop/files/152883_375x375_crop_center.jpg?v=1773141333)

![LQX MARKER WHITE [DIGITAL SWATCH]](http://www.liquitex.com/cdn/shop/files/152867_558ae1f7-7dc4-46c6-85f4-7e16cc6e2871_375x375_crop_center.jpg?v=1773140784)

![LQX MARKER BLACK [DIGITAL SWATCH]](http://www.liquitex.com/cdn/shop/files/152862_53cfec6d-8e84-41b3-ae19-3737d18c343d_375x375_crop_center.jpg?v=1773141261)

![LQX MARKER METALLIC PURPLE [DIGITAL SWATCH]](http://www.liquitex.com/cdn/shop/files/152854_375x375_crop_center.jpg?v=1773142085)


STEP 1
OBSERVING & SIMPLIFYING YOUR PET
Begin by selecting a clear reference photo of your pet. Focus on identifying the most recognizable features, such as the shape of the head, ears, eyes, and nose.
Instead of aiming for realism, simplify these features into basic shapes (circle, ovals & triangles). This approach makes the drawing more approachable and allows for a more stylized, expressive result.
Pay special attention to exaggerating key features, such as larger eyes or taller ears, to capture personality.

STEP 2
TRANSFERRING THE DRAWING TO SURFACE
Lightly sketch your pet onto the wood surface using a pencil. Keep your lines minimal and focus on placement and proportion rather than detail.
Avoid pressing too hard, as softer lines are easier to cover with markers later.

STEP 3
BUILDING COLOR IN THE PORTRAIT
Begin filling in the main areas of the portrait using Liquitex Markers. Apply smooth, even strokes, allowing the opacity of the markers to create solid coverage.
Rather than blending traditionally, layer colors in a graphic way by placing strokes next to or on top of each other. In the example, cool tones are used in the face with contrasting warm and bright accents, creating a dynamic and playful look.
As you work, observe your reference photo and look for shapes created by light and shadow rather than small details. Simplify these shapes into bold, flat areas of color.
If working on a toned surface like wood, allow some of the wood color to remain visible to add character.

STEP 4
ADDING EXPRESSIVE BACKGROUND COLOR
Surround the portrait with energetic, layered color marks to create contrast and movement. Use quick, loose strokes and vary your colors to build a vibrant backdrop.
These marks can overlap and intersect, creating a sense of depth and spontaneity. The goal is to frame the portrait while adding visual energy without overpowering the subject.
Keep the strokes bold and intuitive rather than overly controlled.

STEP 5
CREATING BOLD LINEWORK
Using black or a dark Liquitex Marker, begin outlining your drawing with confident, continuous lines.
Focus on capturing the essential shapes of the face and features rather than small details. Vary line weight slightly to add interest and emphasis, using thicker lines for the outer silhouette and slightly thinner lines for interior features.
This step defines the structure of the portrait and gives it a strong, graphic foundation.

STEP 6
REFINING DETAILS & HIGHLIGHTS
Return to the portrait to refine key features. Reinforce outlines where needed and add smaller details such as whiskers, fur marks, or texture lines.
Use lighter colors or white to introduce highlights on the eyes, nose, and edges of the face, helping to bring the portrait to life.
Adjust elements as needed to ensure the subject remains the focal point against the vibrant background.


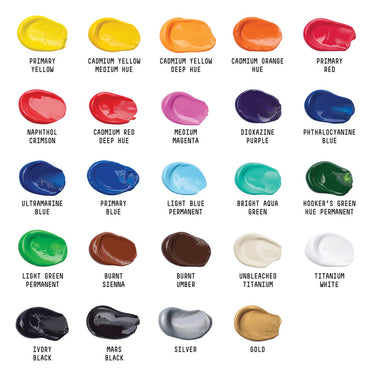
![LQX BASICS 24X22ML PAINT SET 887452028543 [FRONT]](http://www.liquitex.com/cdn/shop/files/80833_375x375_crop_center.jpg?v=1762458732)
![LQX ACRYLIC MARKER SET 6X 2-4MM CLASSICS [CONTENTS] 887452001225](http://www.liquitex.com/cdn/shop/files/68762_375x375_crop_center.jpg?v=1707320720)


![LQX BASICS 6x118ML SET 887452059226 [SET WITH CONTENTS 2]](http://www.liquitex.com/cdn/shop/files/130398_375x375_crop_center.jpg?v=1707324060)
![LQX BASICS 6x118ML SET 887452059226 [FRONT]](http://www.liquitex.com/cdn/shop/files/130396_375x375_crop_center.jpg?v=1762458768)
![LQX MATTE POURING MEDIUM SET [CONTENTS] 887452048695 [NA]](http://www.liquitex.com/cdn/shop/files/96237_375x375_crop_center.jpg?v=1762458531)