





SHOP WHAT YOU NEED
Explore the products below to collect everything you need for this project

![LQX MARKER BRIGHT PINK [DIGITAL SWATCH]](http://www.liquitex.com/cdn/shop/files/152893_375x375_crop_center.jpg?v=1773141303)


![LQX MARKER YELLOW [DIGITAL SWATCH]](http://www.liquitex.com/cdn/shop/files/152905_60dbaa0f-7b09-4c19-9199-d133cf895cdb_375x375_crop_center.jpg?v=1773146099)

![LQX MARKER RED [DIGITAL SWATCH]](http://www.liquitex.com/cdn/shop/files/152898_6e891482-b681-405a-b0f1-4c3ceee75228_375x375_crop_center.jpg?v=1773141066)

![LQX MARKER LIGHT BLUE [DIGITAL SWATCH]](http://www.liquitex.com/cdn/shop/files/152883_375x375_crop_center.jpg?v=1773141333)

![LQX MARKER WHITE [DIGITAL SWATCH]](http://www.liquitex.com/cdn/shop/files/152867_558ae1f7-7dc4-46c6-85f4-7e16cc6e2871_375x375_crop_center.jpg?v=1773140784)

![LQX MARKER BLACK [DIGITAL SWATCH]](http://www.liquitex.com/cdn/shop/files/152862_53cfec6d-8e84-41b3-ae19-3737d18c343d_375x375_crop_center.jpg?v=1773141261)

![LQX MARKER METALLIC PURPLE [DIGITAL SWATCH]](http://www.liquitex.com/cdn/shop/files/152854_375x375_crop_center.jpg?v=1773142085)

![LQX MARKER METALLIC GREEN [DIGITAL SWATCH]](http://www.liquitex.com/cdn/shop/files/152849_375x375_crop_center.jpg?v=1773150450)


![LQX RECYCLED CANVAS - TRADITIONAL 12X12IN [FRONT] 887452056812](http://www.liquitex.com/cdn/shop/files/113309_375x375_crop_center.jpg?v=1762458579)


STEP 1
GATHER SUPPLIES
Put the prewashed garment on a flat surface and have all the supplies handy. If the fabric is thin, put a piece of palette paper or other paper underneath to protect the work surface.

STEP 2
PREPARE THE SURFACE
Squeeze out some Fabric Medium onto a piece of palette paper. Use the 1 inch paddle brush to paint the Fabric Medium wherever the Markers will be applied. In this example, the entire rectangle on the jacket was primed with Fabric Medium.
This medium keeps the Markers from completely sinking into the fabric and helps them be more flexible on the surface. Use a small amount of the medium, and use the brush to work it into the fibers of the fabric. Allow the Fabric Medium to get touch dry. Be aware that the Fabric Medium may make the fabric look slightly darker. This is more apparent on a dark surface.

STEP 3
SKETCH DESIGN
Take the white pastel pencil and sketch the design on top of the dry or touch dry Fabric Medium.

STEP 4
FILL LARGE SHAPES
If using this design, take the 15mm Orange Marker and fill in the moth wings, for example. The 15mm Marker makes it easy to fill in larger areas quickly. A smaller nib Marker or other color could be used as well

STEP 5
FILL SMALLER SHAPES AND LINES
Use the 8mm and 2mm Markers to overlay smaller shapes and fine lines on top of the larger shapes of color. Since the Markers dry rapidly, there should be minimal blending of color. If the Markers are too damp, feel free to use the hair dryer to quickly dry them before layering.

STEP 6
ALLOW TO DRY
The Markers get touch dry quite quickly. On fabrics and washable surfaces, be sure to allow the Markers at least 72 hours drying time before laundering. If possible, wash the garment inside out on gentle cycle, and drip dry for best results.



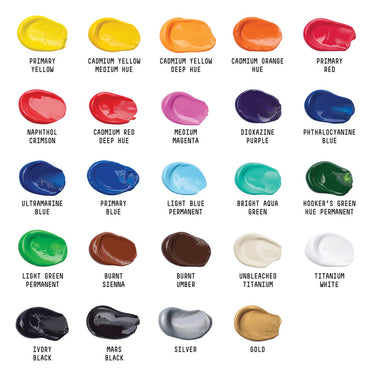
![LQX BASICS 24X22ML PAINT SET 887452028543 [FRONT]](http://www.liquitex.com/cdn/shop/files/80833_375x375_crop_center.jpg?v=1762458732)
![LQX ACRYLIC MARKER SET 6X 2-4MM CLASSICS [CONTENTS] 887452001225](http://www.liquitex.com/cdn/shop/files/68762_375x375_crop_center.jpg?v=1707320720)


![LQX BASICS 6x118ML SET 887452059226 [SET WITH CONTENTS 2]](http://www.liquitex.com/cdn/shop/files/130398_375x375_crop_center.jpg?v=1707324060)
![LQX BASICS 6x118ML SET 887452059226 [FRONT]](http://www.liquitex.com/cdn/shop/files/130396_375x375_crop_center.jpg?v=1762458768)